Now, I gotta tell ya, if you’re havin’ trouble with that spacebar on your keyboard, and it ain’t workin’ like it should, you might need to take it off and clean underneath. Don’t worry, it ain’t that hard once you know what you’re doin’. I’m gonna walk ya through it nice and slow, so you can get that spacebar off without breakin’ anything. Now, let’s get to it, huh?
Step 1: Get Yourself the Right Tools
First things first, you gotta make sure you got the right tools. Now, I ain’t talkin’ about fancy tools or anything like that, just some simple stuff. You’ll need a small screwdriver, one of them keycap pullers if you got one, and if you don’t, you can use somethin’ like a paperclip or a safety pin. Ain’t no need to rush, take your time and find somethin’ that works for ya.
Step 2: Gently Lift the Spacebar
Now, you’ll want to place your fingers under each side of the spacebar. Don’t go pressin’ too hard, just gently lift it up. You should feel it start to pop loose. If it don’t come off easy, don’t force it. If you got one of them stabilized spacebars, you might need that keycap puller. Just slip it in the sides of the spacebar and pull gently. If you use a paperclip, bend it a bit, make a little hook, and try liftin’ the spacebar that way. Just be patient, and don’t go rushin’ it.
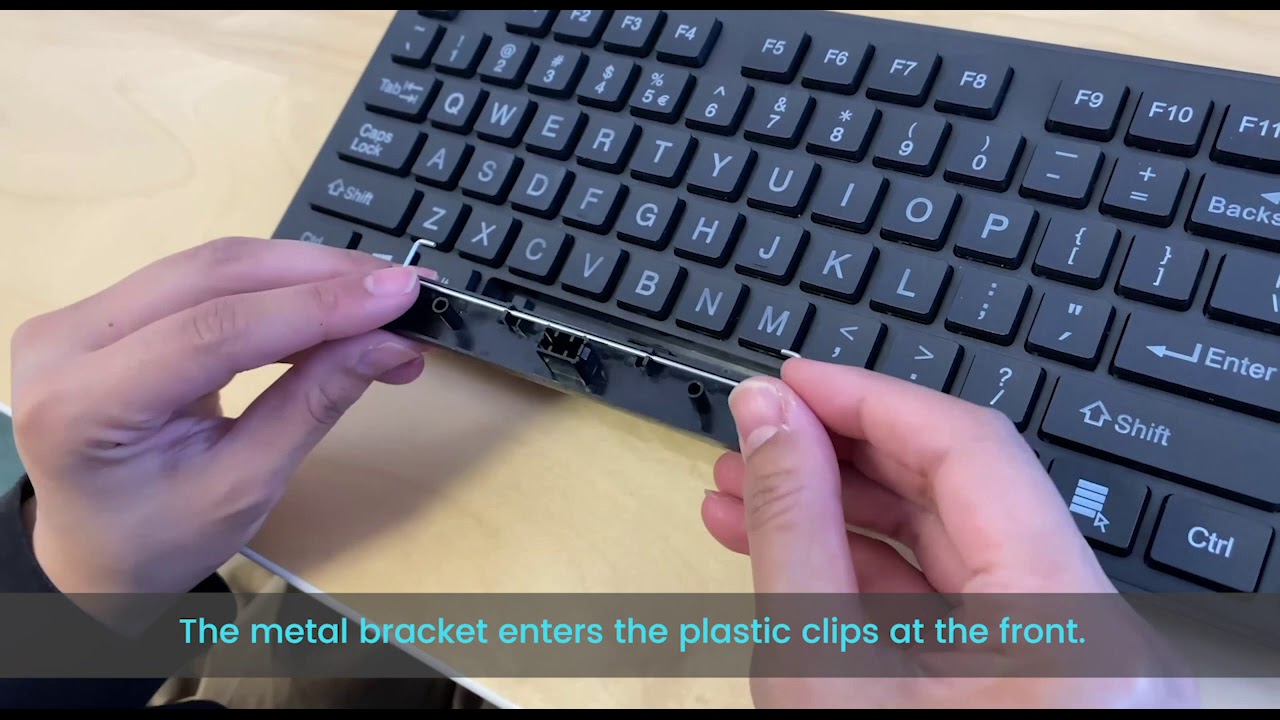
Step 3: Be Careful with the Stabilizers
Now, I gotta warn ya, the spacebar is a bit tricky ’cause it’s got them stabilizers underneath it. Them things help it stay nice and even when you press it. You don’t wanna break them, so be real gentle when you lift the key. If it’s stuck real good, you might need to wiggle the keycap puller around a bit to loosen it up, but don’t go yankin’ it, alright?
Step 4: Clean the Keycap and the Switch
Once you got that spacebar off, you might wanna give it a good cleanin’. Dust and crumbs can get all up in there, and that’s what messes with the spacebar. Get a soft cloth, maybe a little bit of water (not too much, though!), and wipe down the keycap. While you’re at it, check the switch underneath the spacebar and make sure it ain’t clogged up with dirt. If it is, give it a clean, too. That’ll help keep everything runnin’ smooth when you put it back on.
Step 5: Put the Spacebar Back On
Now, after you done cleaned everything, it’s time to put that spacebar back on. Just line it up with them little pegs underneath, and press down. It should snap right back into place. If it don’t, check if the stabilizers are lined up properly. Sometimes they get out of place, and you’ll need to adjust ’em a little bit before the spacebar fits right.
Step 6: Test It Out
Last thing you gotta do is make sure it works. Hit that spacebar a couple times and see if it’s nice and smooth. If it’s still stickin’ or feelin’ funny, you might need to take it off again and clean it a bit more. Sometimes a little extra cleanin’ can make all the difference.
Some Extra Tips
- If your spacebar is still not workin’, it could be the switch underneath is broken. In that case, you might need to replace it, or get help from someone who knows about them switches.
- Don’t go using too much water when cleaning your keyboard. A damp cloth will do the trick, but too much water can mess up the electronics inside.
- If the spacebar is real stubborn, you can try heating it up a little bit with a hairdryer, but be careful! You don’t want to melt anything.
So there you have it! Removing your spacebar and cleanin’ it up ain’t no big deal if you follow these simple steps. Just remember, take your time and don’t rush. If you do, it’ll all come together nice and easy, and your spacebar will be good as new! Good luck!
Tags:[how to remove spacebar, keyboard maintenance, spacebar cleaning, mechanical keyboard, keycap puller, keyboard repair]