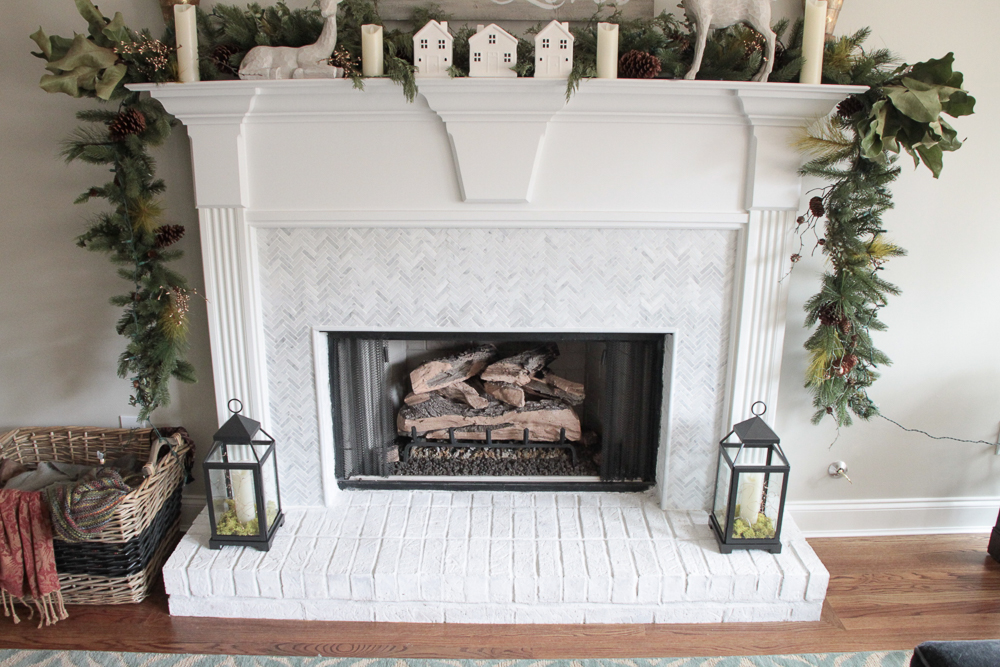
Alright, folks, let’s talk about my recent DIY adventure – tiling my fireplace with a herringbone pattern. I’ve always loved the look of herringbone, and I figured, “How hard could it be?” Well, let me tell you, it was a bit more involved than I initially thought, but totally worth it in the end!
Getting Started
First things first, I gathered my materials. I picked out some lovely ceramic tiles that had a bit of a rustic vibe, perfect for my living room. Of course, I also needed thin-set mortar, grout, a notched trowel, a wet saw (rented that bad boy!), a level, some spacers, and a whole lot of patience.
Before I slapped any mortar on, I did a dry fit. This is crucial, especially with a herringbone pattern. I laid out the tiles on the floor, playing around with the arrangement until I was happy with how it looked. This also helped me figure out where I’d need to make cuts.
The Tiling Process
Okay, time for the real deal. I mixed up the thin-set mortar according to the instructions on the bag – you want it to be the consistency of peanut butter, not too runny, not too thick. Then, I started applying it to the fireplace surround with the notched trowel. I worked in small sections, because this stuff dries pretty fast.
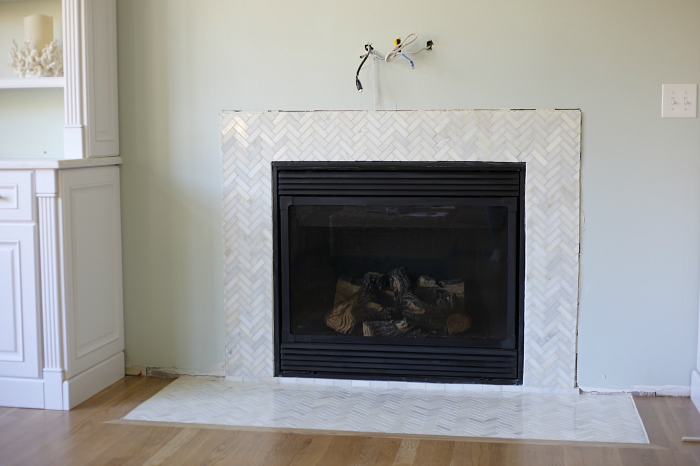
Here’s where the herringbone magic happens. I placed the first tile at a 45-degree angle, and then positioned the second tile perpendicular to it, creating that signature “V” shape. I used spacers to keep everything even and made sure each tile was level. It was slow going, I’m not gonna lie, but seeing the pattern emerge was super satisfying.
The wet saw was my best friend for this project. I used it to make all the angled cuts along the edges of the fireplace. It took some practice to get the hang of it, but I managed to get pretty clean cuts after a few tries (and a few messed-up tiles, oops!).
Once all the tiles were in place, I let the mortar dry completely – usually, about 24 hours. You don’t want to rush this part!
Grouting and Finishing
After the mortar was good and dry, it was time to grout. I chose a grout color that complemented the tiles, a nice warm gray. I mixed the grout, again following the instructions, and then applied it with a grout float, making sure to push it into all the gaps between the tiles.
Then, I used a damp sponge to wipe away the excess grout, revealing the beautiful herringbone pattern. This part was a bit messy, but so rewarding!
Finally, after the grout had dried for a few days, I applied a grout sealer to protect it from stains and moisture. And that’s it! My fireplace was officially transformed.
- Gather materials: tiles, mortar, grout, tools.
- Dry fit: important to determine tile layout and cuts.
- Apply mortar: small sections, use a notched trowel.
- Tile placement: place tiles at 45 to one anthor, use spacers and level.
Honestly, it was a challenging project, but I’m so proud of how it turned out. My living room has a whole new focal point, and I did it myself! If you’re thinking about tackling a herringbone tile project, I say go for it – just be prepared to put in some time and effort. You got this!