Okay, so I saw this awesome thing online – a Star Wars Han Solo Carbonite fridge! And, you know me, I had to try and make one myself. I mean, who wouldn’t want a mini-fridge that looks like Han Solo frozen in carbonite? It’s the ultimate geeky home decor!
First, I found a mini-fridge. Nothing fancy, just a basic one that was the right size. I wanted it to be big enough to hold a decent amount of drinks, but not so big that it would take up too much space.
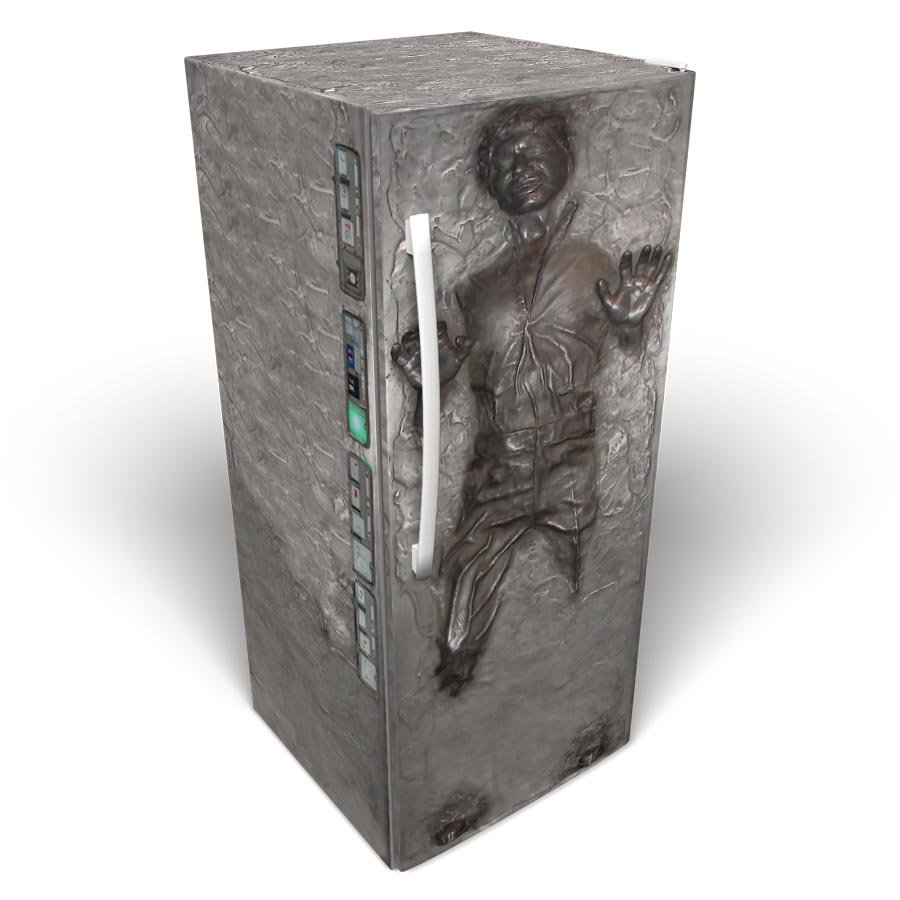
Getting the Shape Right
Next, the hard part – making the carbonite shell. I decided to use cardboard for the basic shape. I cut out several large pieces and started shaping them around the fridge, like a giant puzzle. I used a ton of duct tape to hold everything together. It looked pretty rough at this stage, but I knew I could smooth it out later.
- Cut cardboard pieces to fit the fridge.
- Used lots of duct tape to secure the pieces.
- Made sure to leave the fridge door accessible!
Adding the Details
Once the basic shape was done, I covered the whole thing in a layer of paper mache. I just mixed flour and water, you know like, elementry school craft. and slathered it on. This helped to smooth out the rough edges and make it more solid. I added a few extra layers around the edges where Han Solo’s body would be, to give it that “frozen” look.
After the paper mache dried, I used some spray foam insulation to create the raised details of Han Solo’s body. I’m not gonna lie, this part was tricky! I tried to follow a picture I found online, but it was still tough to get it just right. It ended up looking a bit blobby, but hey, it’s carbonite, it’s supposed to be a bit rough, right?
Painting and Finishing
Once the foam dried, I sanded down any really rough spots. Then came the painting. I used a metallic silver spray paint for the base coat. This gave it that classic carbonite look. After that, I went in with some black and brown acrylic paints to add shadows and highlights. I wanted to make it look like