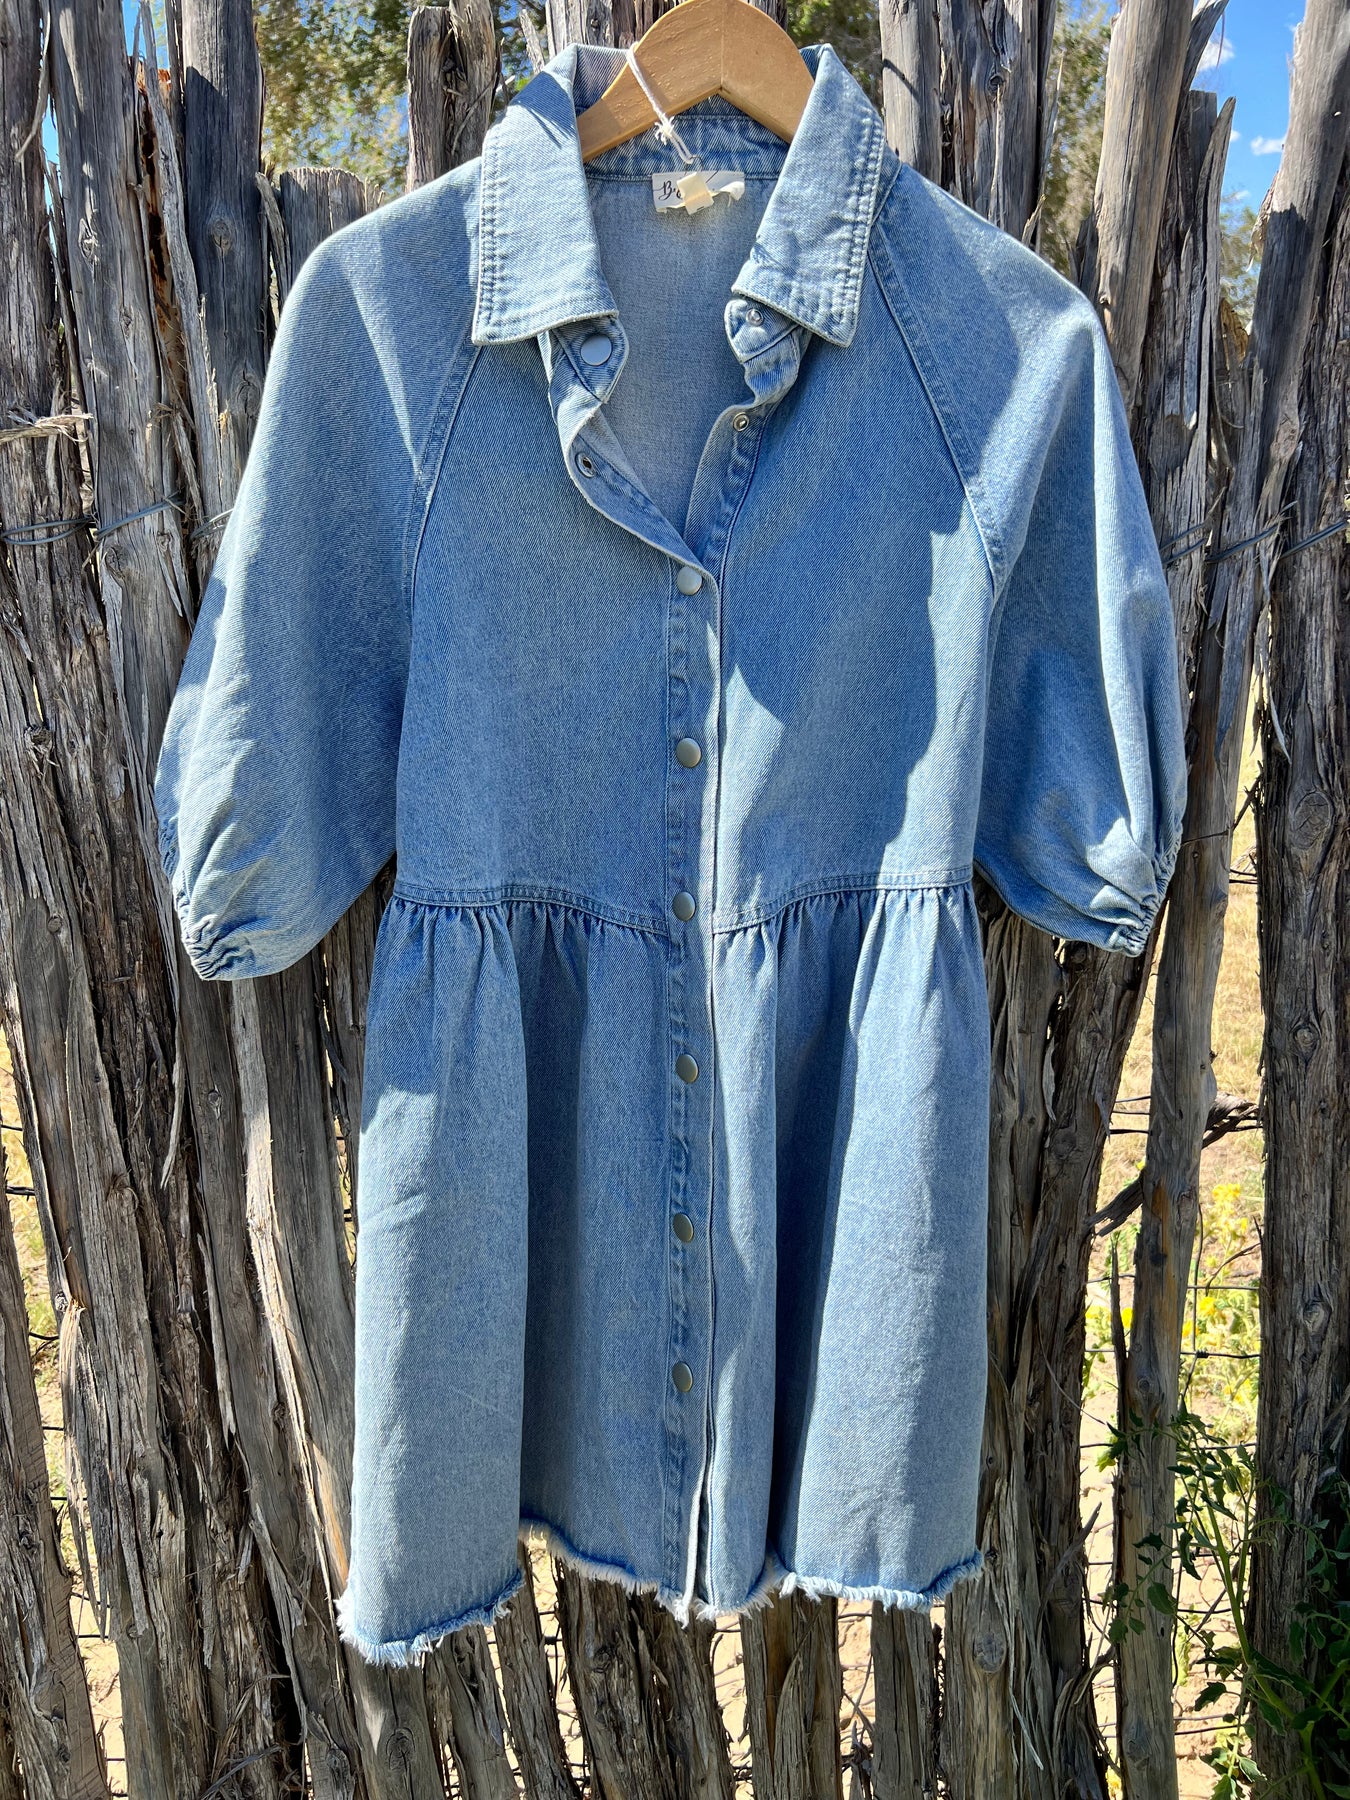
Alright, so I’d been wanting to make something with that washed denim I had lying around. You know the kind, soft, already got that worn-in feel. And then it hit me – a puff sleeve dress. Seemed like a good combo, a bit girly with the sleeves, but sturdy with the denim.
Getting Started
First things first, I pulled out that denim. It was a decent piece, probably enough for what I had in mind. I always, always wash new fabric, especially denim. Don’t want any surprises with shrinking after all the work, right? So, into the machine it went. Then I gave it a good press with the iron. Denim can be a bit stubborn, but you gotta get it flat for cutting.
I had a basic dress pattern, one I’ve used before and tweaked. For the puff sleeves, I knew I’d have to adjust the sleeve head, make it wider and taller to get that volume. I sketched it out a bit, making sure I had enough fabric for the gathers.
Cutting and Prepping
Laying out the pattern pieces on the denim took some time. Denim’s got a grain, and you want to respect that. I pinned everything down super carefully. Cutting denim, even the softer washed kind, needs a sharp pair of scissors or a good rotary cutter. My scissors did the job. I cut out the front bodice, back bodice pieces, the skirt panels – I went for a slightly A-line shape – and then the big sleeve pieces. Plus facings for the neckline, of course.
Putting it Together – Bodice First
I started with the bodice. Sewed the shoulder seams, then the side seams. I pressed all my seams open as I went. It just makes everything look neater, you know? The neckline facing went on next. Stitched it, understitched it, turned it, and gave it a good press. That was looking pretty dress-like already.
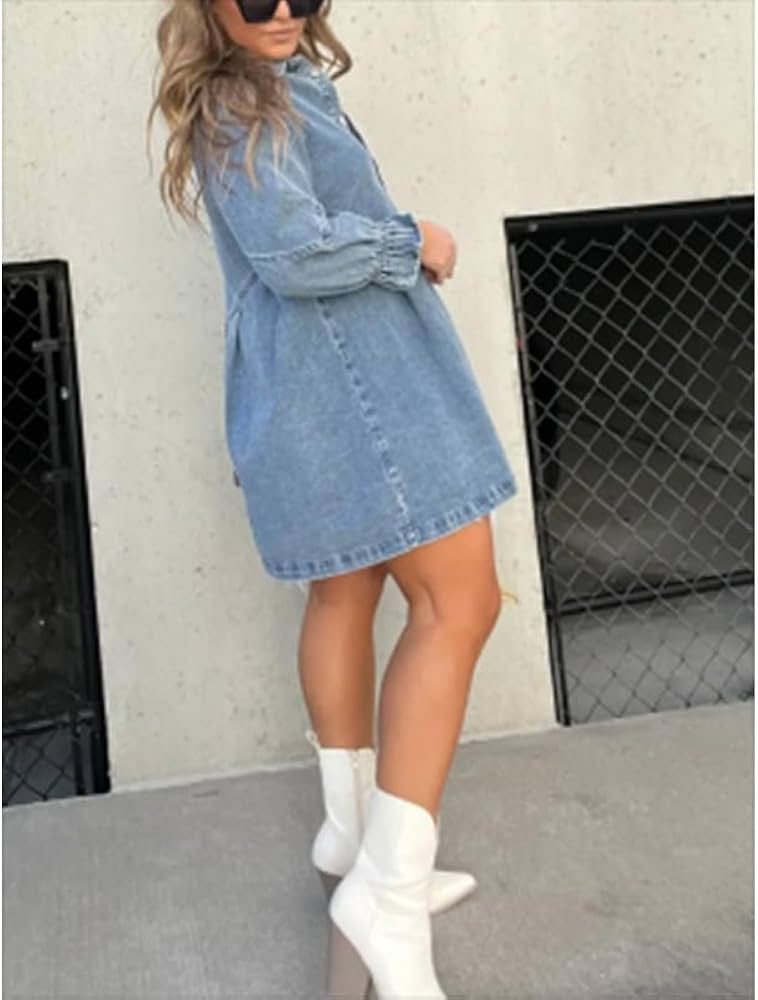
Tackling Those Puff Sleeves
Now for the main event – the puff sleeves. This is where it gets fun, or frustrating, depending on the day! I ran two lines of basting stitches along the top edge of each sleeve head. This is how you get the gathers for the puff. Then I did the same for the sleeve hem, where the elastic would go to create that cuffed puff.
Pulling those basting threads to gather the sleeve head took a bit of fiddling. You want the gathers to be even, not all bunched up in one spot. Once I was happy with how they looked, I pinned them into the armholes of the bodice. Lots of pins. Then, I sewed them in. Carefully.
For the sleeve cuffs, I made a little casing for the elastic. Threaded the elastic through, adjusted it so it was snug but not too tight on my arm, and then sewed the elastic ends together. Closed up the casing, and bam – puff achieved at the bottom too!
Skirt and Finishing Up
Next up was attaching the skirt to the bodice. Matched up the waist seams, pinned it all around, and sewed that seam. Again, pressed it. I was thinking about a zipper for the back. So, I installed a centered zipper. Took a couple of tries to get it perfectly straight, denim can be a bit shifty.
The last major step was the hem. I tried the dress on, figured out the length I wanted. Turned it up, pressed it, turned it up again for a clean finish, and stitched it down. I like a good, solid hem, especially on denim.
I gave the whole dress one final press. Looked it over for any loose threads. Snip, snip.
The Final Result
And there it was! My washed denim puff sleeve dress. I tried it on, and honestly, I was pretty pleased. The denim felt comfortable, and the puff sleeves added that little something I was going for. It wasn’t too fussy, just a nice, wearable dress. Definitely a successful make, and I can see myself wearing this a lot. It’s just one of those projects that comes together and you think, yeah, that worked out.