Alright, so let me tell you about this knight armour hoodie project I tackled. It wasn’t some grand plan, y’know? I just had this old hoodie, super comfy, but kinda boring. And I thought, “How can I make this thing cooler?” The idea of knight armour just sort of… clicked. Something fun, a bit silly, but definitely a statement.
Getting Started – The Bits and Pieces
First thing, I had to figure out what I needed. Didn’t want to go out and buy a ton of fancy stuff. I’m more of a “use what you’ve got” kind of person. So, I dug around and found:
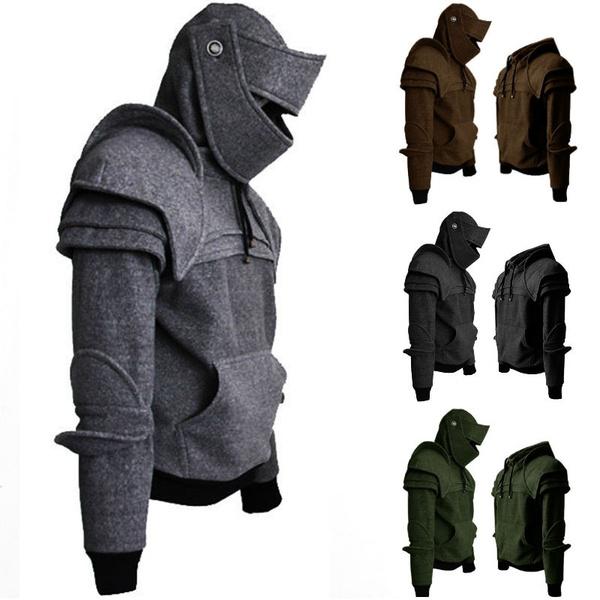
- The aforementioned boring hoodie. Mine was a dark grey, which felt like a good base.
- Some sheets of that stiff felt stuff. I thought it would be easy to cut and hold its shape okay without being too heavy. Silver or grey felt seemed right.
- Good old needle and thread. Black thread, so it wouldn’t stand out too much on the grey hoodie.
- Sharp scissors. Always need sharp scissors.
- Chalk or a light pencil for marking out shapes on the felt.
That was pretty much it for the basics. I figured I could improvise if I needed anything else.
Drawing and Cutting – Making it Look Like Armour
So, I didn’t get all technical with patterns. I just sort of eyeballed it. I laid the hoodie flat and started thinking about where the “armour” plates would go. Shoulders, definitely. Maybe a chest piece. Some elbow bits. I grabbed the chalk and started drawing shapes directly onto the felt. Think big, chunky, knightly shapes. Lots of angles.
Cutting them out was straightforward. Just took my time with the scissors to keep the edges reasonably neat. I made two shoulder pieces – pauldron-looking things – and then a sort of shield shape for the chest. For the elbows, just some smaller rounded squares. I wasn’t aiming for historical accuracy, just something that screamed “knight” in a fun way.
Sticking it All Together – The Sewing Part
This was the bit that took the most time. I’m no master tailor, let me tell you. I pinned the felt pieces onto the hoodie first, just to see how they looked and to make sure they were positioned right. Moved them around a bit until I was happy.
Then came the sewing. I just did a simple running stitch around the edges of each felt piece. My main goal was to make sure they were stuck on there good and proper. Didn’t want bits falling off after one wear. The shoulders were a bit tricky because of the curve, but I managed. The chest piece was easier, being flat. Took a few hours, a bit of finger-pricking, but I got there. I specifically chose to sew rather than glue because I wanted it to last through a wash, maybe. Glue can get weird.
The Final Look and Little Touches
Once everything was sewn on, I tried it on. And you know what? It looked pretty cool! The felt gave it that armour-plate feel without being uncomfortable. It wasn’t heavy or stiff, which was important.
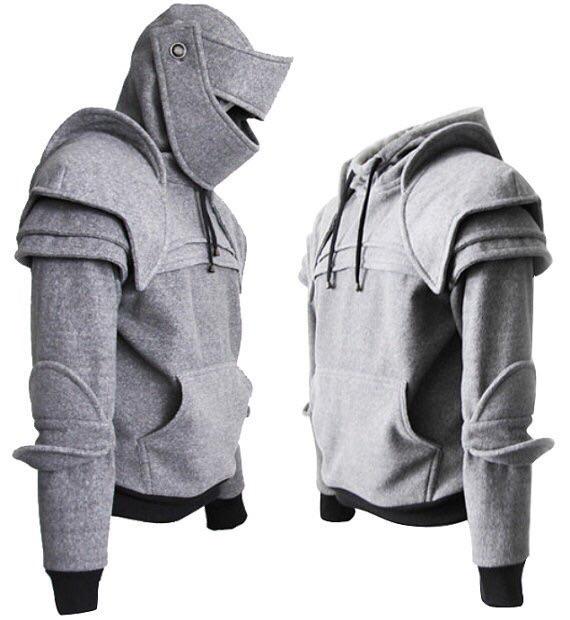
I thought about adding more details, like studs or drawing on some rivets with a permanent marker. I actually had some metallic silver paint pen lying around, so I used that to draw a few lines on the “plates” to give them a bit more definition, like seams on metal. Didn’t go overboard, just enough to make it pop a little.
Overall, I was pretty chuffed with how it turned out. It was a simple enough project, didn’t cost much, and I ended up with a unique hoodie. It’s definitely a conversation starter. And hey, if I can do it, anyone can. Just grab an old hoodie and some felt and see what happens. It’s all about having a bit of fun with it, right?