Okay, so I’ve been wanting to build something cool for the backyard, and I finally decided to tackle an octagon grill table. I’m no master carpenter, but I’m pretty handy, so I figured, why not? Let’s dive into how this whole thing went down.
Planning and Prep
First things first, I needed a plan. I sketched out a rough design, nothing fancy, just enough to get a sense of the dimensions and how it would all fit together. I wanted it big enough to comfortably seat people around, but not so huge that it would dominate the entire patio. After some fiddling, I settled on the size and started gathering materials.
I hit up the local hardware store and grabbed a bunch of lumber – mostly 2x4s and some wider boards for the tabletop. I also picked up some screws, wood glue, and some exterior stain to protect it from the elements. I opted to use cedar because I love how that looks, it ages so nicely!
Building the Base
The base was the trickiest part. I started by cutting the eight sides of the octagon. The angles were a bit of a pain, but I used a miter saw and took my time, making sure each piece was cut precisely. My old miter saw nearly bit the dust, but it pulled through! Double-checking those angles is key, trust me.
Then, I assembled the frame, using wood glue and screws to hold it all together. I built it in sections, kind of like building blocks, and then joined the sections to form the octagon shape. It’s much easier to maneuver smaller parts, especially when you’re working solo like I was.
- Cut the wood.
- Assemble octagon sections.
- Use lots of wood glue and screws.
Creating the Tabletop
The tabletop was pretty straightforward. I laid out the wider boards, arranged them in an octagon shape, and then secured them to the base using more screws. I made sure to leave a small gap between the boards to allow for expansion and contraction with the weather. No one wants a warped tabletop!
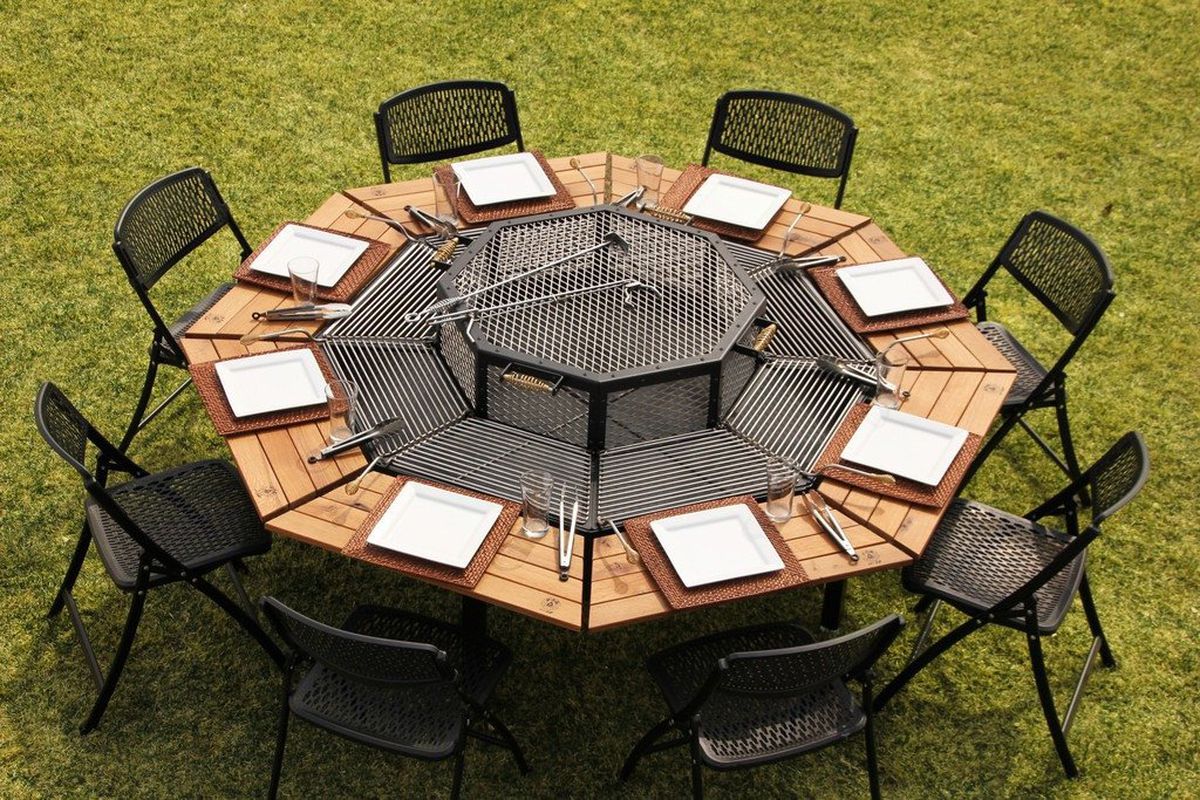
The Grill Insert (The Fun Part!)
Now for the star of the show: the grill! I bought a standard-sized, round charcoal grill. The key here to measure the grill diameter accurately and then cut a circular hole in the center of the tabletop. I used a jigsaw for this, going slow and steady to get a nice, clean cut. The grill fit in perfectly, resting snugly on the frame I built underneath.
Finishing Touches
Once everything was assembled, I sanded down all the rough edges and applied a couple of coats of exterior stain. This not only makes it look good but also protects the wood from rain, sun, and whatever else Mother Nature throws at it. I let it dry completely, which took a good 24 hours, maybe a bit more with the humidity.
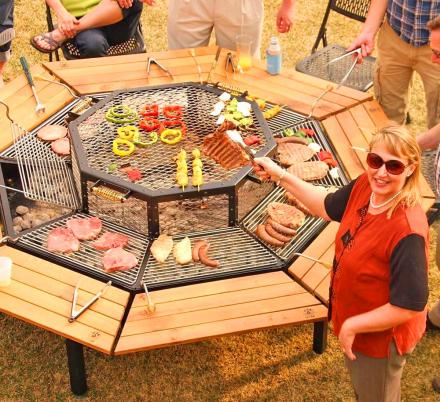
And that’s it! My octagon grill table was complete. It was a fun project, and I’m pretty stoked with how it turned out. It’s already become the centerpiece of our backyard gatherings. We’ve had some awesome cookouts, and it’s just a great place to hang out and enjoy the evenings. If you’re thinking about building one, I say go for it! Just take your time, double-check your measurements, and don’t be afraid to get a little creative.