So, I’d been itching for a new keyboard project for a while. My old mechanical was great, but it was a bit of a beast on my desk. Plus, I kept seeing these super sleek, low-profile keyboards popping up everywhere and thought, “Yeah, I want a piece of that action.” My wrists were also starting to feel a bit tired from the height of my old board. Seemed like a good excuse to dive in and build one myself, right?
Getting the Bits and Pieces Together
First off, the hunt for parts. This wasn’t as straightforward as my last build. Low-profile means everything’s gotta be, well, lower. Specific stuff.

- PCB: This was the heart of it. I needed something that specifically supported low-profile switches. Scoured the usual places online and eventually landed on one that didn’t look too complicated and wasn’t crazy expensive. It was hotswap too, which I figured would save me some headache with soldering those tiny Choc pins.
- Switches: Speaking of Chocs, I went with Kailh Choc Reds. Wanted something linear and quiet for a change. Got a bag of them, hoping I wouldn’t mess too many up.
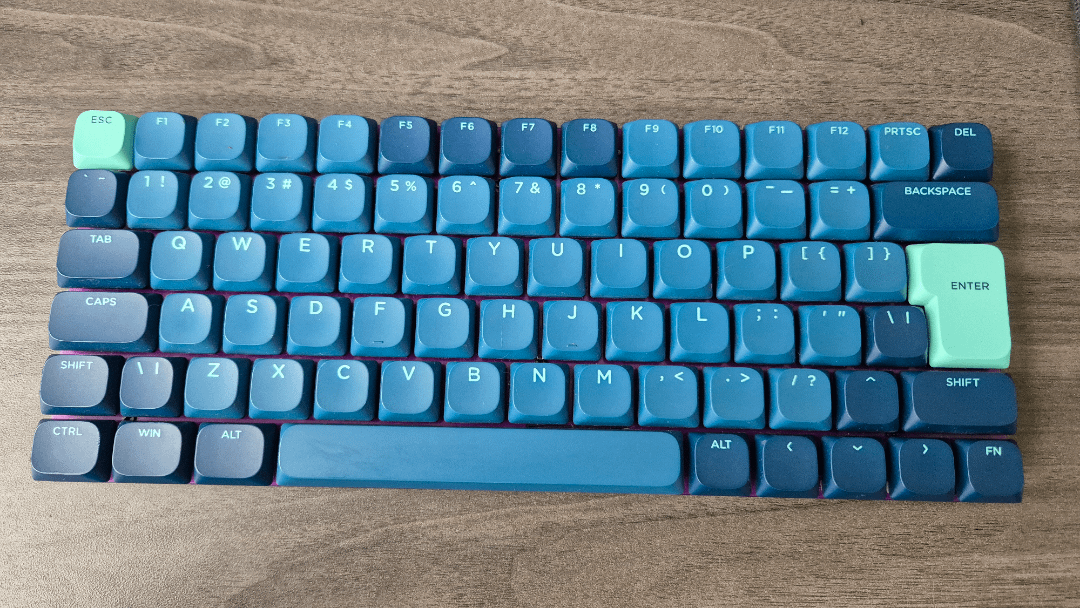
- Keycaps: Man, finding decent low-profile keycaps that weren’t just plain blanks or cost a fortune was a mission. After a lot of clicking around, I found a set that looked pretty sharp. They were PBT, which is nice.
- Case: This was important for the whole “low-profile” vibe. I needed something slim. Found a basic aluminum tray-mount case that looked like it would do the trick. Nothing fancy, just functional.
- Stabilizers: Had to get specific low-profile stabilizers too. The regular ones just wouldn’t fit. Picked up a set for the spacebar, shift keys, and enter.
Took a few weeks for everything to arrive. The usual waiting game when you’re ordering parts from all over the place.
The Actual Build Process – Getting My Hands Dirty
Alright, D-day. All the little bags and boxes were on my desk. Time to make a keyboard!
First, I tackled the stabilizers. Popped those suckers onto the PCB. A bit fiddly, those little wires and plastic bits, especially for low-profile ones. Lubed them up a bit, hoping to avoid any annoying rattle. That took a bit more patience than I thought.
Next up, the switches. Since the PCB was hotswap, this was supposed to be the easy part. Just push ’em in. And mostly, it was. Lined up each Kailh Choc switch with its socket and pressed down. Click. Satisfying. But, you gotta make sure those pins are straight. Bent one or two slightly, had to carefully straighten them with tweezers. Learned my lesson to be gentle. Pushed all 70-something switches in. My thumbs were a bit sore afterwards, not gonna lie.
With all the switches in place, it was time to get it into the case. Carefully lowered the PCB and switch assembly into the aluminum tray. Lined up the screw holes. It was a snug fit. Screwed it down. So far, so good. It was starting to look like an actual keyboard!
Then, the keycaps. This is always the fun part, like putting the icing on the cake. Snapped them onto the switch stems one by one. The low-profile caps felt different, much flatter than what I was used to. But they looked cool, super minimalist.
Testing and a Few “Oh Crap” Moments
The moment of truth. Plugged in the USB-C cable. The underglow LEDs on the PCB fired up! Always a good sign. Opened up a text editor and started mashing keys. A, S, D, F… all good. Spacebar… clacky. Enter… nice. But then, the ‘T’ key. Nothing. Dead. My heart skipped a beat. Did I get a dud switch? Or worse, a bad hotswap socket?
Pulled off the ‘T’ keycap. Pulled out the switch using the switch puller. Inspected the pins on the switch – they looked okay. Looked into the socket – nothing obviously wrong. Popped the switch back in, made sure it was really seated this time. Click. Put the keycap back on. Typed ‘T’. It worked! Phew. Must have just not pushed it in hard enough the first time. Dodged a bullet there.
The spacebar also felt a tiny bit off on one side. Took the cap off, checked the stabilizers. One side wasn’t quite clipped in properly. Reseated it, and that sorted it out. These builds, always some little thing you gotta tweak.
The End Result – Was It Worth It?
So, there it is. My own custom-built low-profile keyboard. It’s way thinner than my old board, takes up less space, and just looks clean on the desk. Typing on it is definitely different. The key travel is much shorter. Took a day or two to get used to it, but now I’m really liking it. My fingers feel like they’re flying across the keys, and my wrists are definitely happier.
It’s not perfect, I’m sure a hardcore enthusiast could find flaws. But I put it together. Every key I press, I know I had a hand in making it work. That’s a pretty good feeling. It was a fun little adventure, a bit frustrating at times, but totally worth it in the end. Now, what to build next…?